The Centralyn journal
Getting Started with Centralyn: Your First Client Workspace
Create an organization, invite your team, and organize your first client’s work.
What Is Centralyn?
Centralyn brings client records, files, forms, invoices, and reminders into one workspace for service businesses. The Free plan includes one organization, up to 3 clients, and 500 MB of storage.
You can follow this guide on the Free plan, including forms, invoices, and scheduled email reminders. Client and storage limits still apply, and teammates need the relevant permissions.
Step 1: Create Your Organization
Sign up and create an organization for your business. Each organization has its own clients, members, files, and plan.
Step 2: Invite Your Team
Invite teammates and manage their access through owner, admin, and member roles. Team members do not count toward your client allowance.
Step 3: Add Your First Client
Create a client profile with the details your team needs. Track the relationship as Active, On Hold, Completed, or Archived.
Step 4: Set Up Work Records
Choose a template for agency work, bookkeeping, legal cases, freelance projects, team tasks, or client contacts. Adapt the columns and add notes to individual rows.
For a small design project, add a "Website brief" record with a due date, an assigned teammate, and a status of "Awaiting information". Open the row and add a checklist for the brief, source files, and review date.
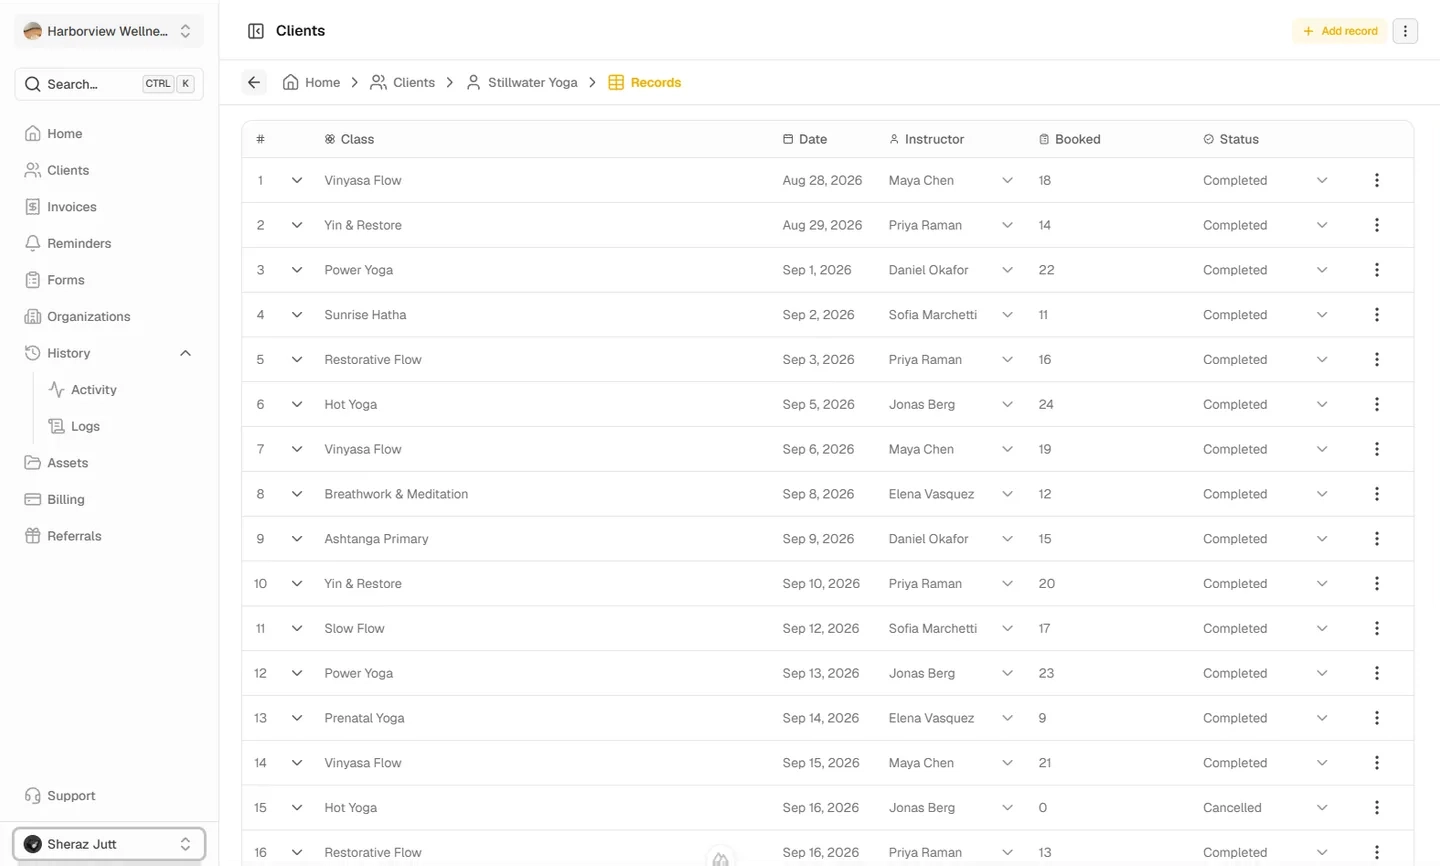
The screenshot shows a scheduling example. Your column names and status options can match the work you track.
Collect Information and Follow Up
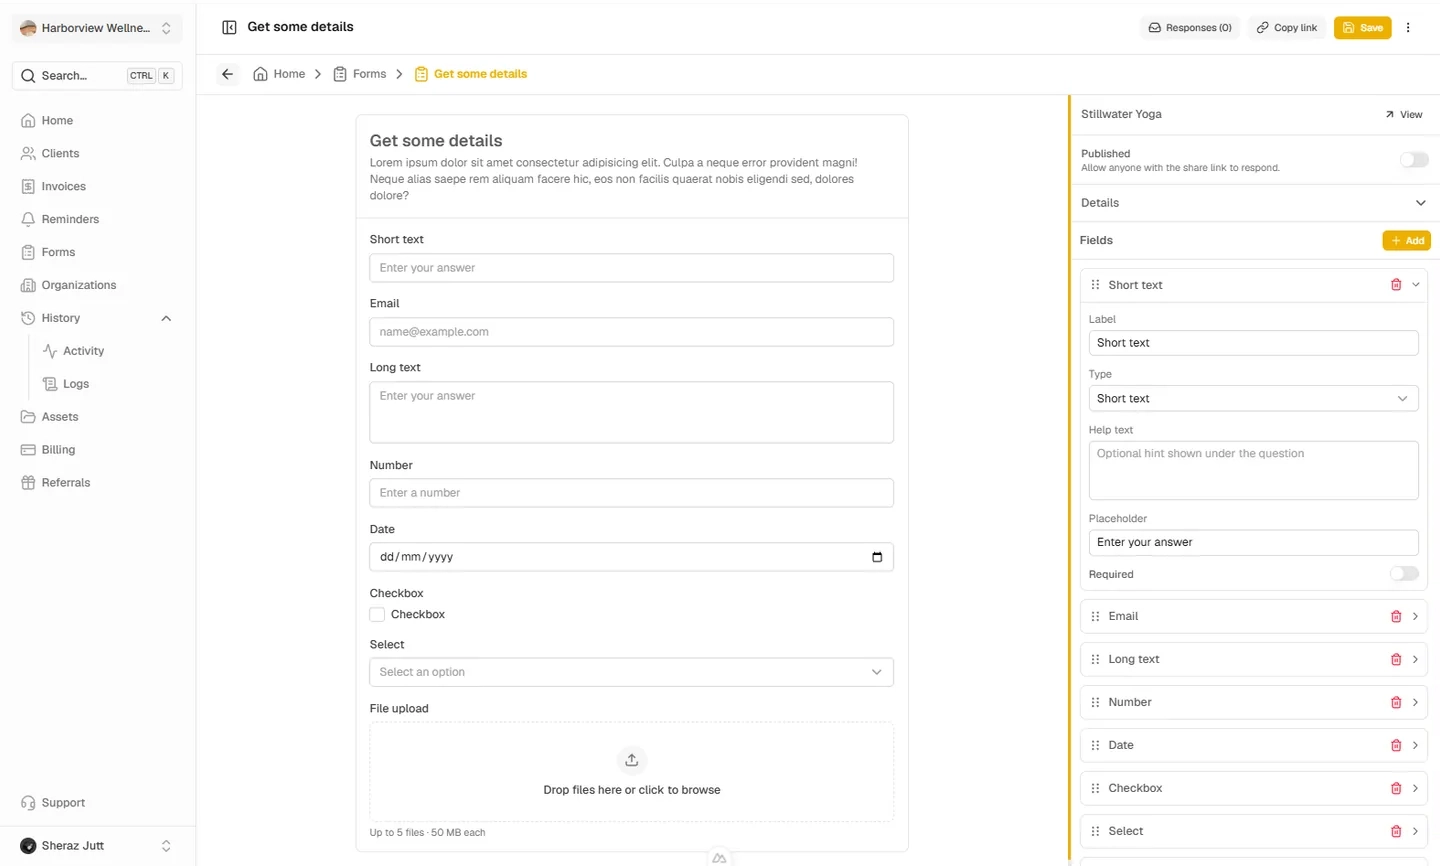
Publish a form to collect details and files without requiring the respondent to sign in. Review submissions, create invoices, and schedule email reminders from your workspace.
For the website brief, ask for the project goals, a target date, and any existing brand files. Publish the form and share its link. After reviewing the response, update the record status yourself and schedule a reminder if information is still missing.
Grow at Your Own Pace
Choose a paid plan when you need more clients or storage. Paid plans are funded from wallet credit for 30-day service periods, with a separate plan for each organization.